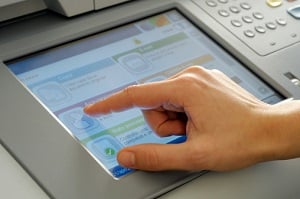
 Security printing capabilities can be useful in many organizations. An investment firm may require security when printing client financial information. A healthcare clinic may utilize secure printing to protect patient records from being viewed by unnecessary personnel. A school could benefit from secure printing features when printing report cards or disciplinary reports, or simply to cut down on paper costs by preventing documents from getting lost in the shuffle. Any organization could benefit from secure printing capabilities; each will likely have unique reasons.
Many types of print jobs can be made secure with a print user box. User boxes help printers control when their document is printed so that it is secure.
User Box 101
A user box function allows those printing from most Konica Minolta multifunction printers to control the timing of their print document - in other words - help them print securely. A user box is a storage location on your multifunction printer that can be used in a few different ways:
- You can send documents to a user box from your computer; when you get to your printer you access the user box and give the printer permission to produce your documents.
- You can scan documents on your multifunction printer and save them in a user box.
- You can fax documents saved in a user box from your printer.
- You can store commonly printed documents in your user box and print at any time without having to send them from your computer.
- Setting and finishing instructions can be given to documents saved in your user box directly from the printer.
Multiple user boxes can be set up so each department or employee, for example, can have their own. If desired, these can be set with PIN numbers, preventing unauthorized users from printing documents held in a user box.
Here are a number of reasons to set up user boxes:
- Ensure only authorized personnel can retrieve sensitive printed documents
- Save time with a single trip to your printer to collect multiple printed documents
- Minimize copy project interruptions caused by print requests
- Gain security and accountability with PIN number print authorization
Managing Your User Boxes
Setting up and managing user boxes for your organization is fairly straightforward. First, you should begin by identifying which employees or departments would benefit from unique user boxes and whether or not they need to be protected with a PIN number.
Adding a User Box
User boxes can be added from your computer or directly from the multifunction printer. In order to set up a user box from your computer you will need to know your printer’s IP address; insert that address in the URL field of your web browser. Open the BOX tab and select SET UP A NEW BOX. From here you can set up the user box per your requirements.
To set up a user box on your printer select UTILITY from the home screen on your printer’s control panel. This will take you to a screen with a number of options, you need to choose #1 – ONE TOUCH/USER BOX REGISTRATION. You will again be presented with a few options, this time select #2 – CREATE USER BOX.
When creating a user box you will have the opportunity to:
- Assign a user box number and/or name
- Set up a password or pin number
- Select how long you want documents to be saved for: 12 hours or 1, 2, 3, 7 or 30 days; Documents will automatically be deleted after the selected time period for security.
Removing a User Box
To delete a user box you will need to empty all documents currently being stored within it. You will also need to have access to the Administrator Settings. An Administer should access the control panel on your printer, and within the CREATE USER BOX window, select DELETE EMPTY USER BOXES.
If you do not have a Konica Minolta multifunction printer, don’t worry – most printers contain a function with similar features. You can determine what features your printer has by referencing your manual.